Deploy Static Assets
WARNING! All of these solutions stand-up a publicly accessible web viewer. Do not hook your hosted viewer up to a sensitive source of data without implementing authentication.
There are a lot of options for deploying static assets. Some services, like
netlify and surge.sh, specialize in static websites. You'll notice that
deploying with them requires much less time and effort, but comes at the cost of
less product offerings.
While not required, it can simplify things to host your Web Viewer alongside
your image archive. Services with more robust product offerings, like
Google Cloud, Microsoft's Azure, and Amazon Web Services (AWS), are able
to accommodate this setup.
Drag-n-drop
Easy
Advanced
Drag-n-drop
Netlify Drop
GIF demonstrating deployment with Netlify Drop
- https://app.netlify.com/drop
- Drag your
build/folder on to the drop target - ...
- annnd you're done
Features:
- Custom domains & HTTPS
- Instant Git integration
- Continuous deployment
- Deploy previews
- Access to add-ons
(Non-free tiers include identity, FaaS, Forms, etc.)
Learn more about Netlify on their website
Easy
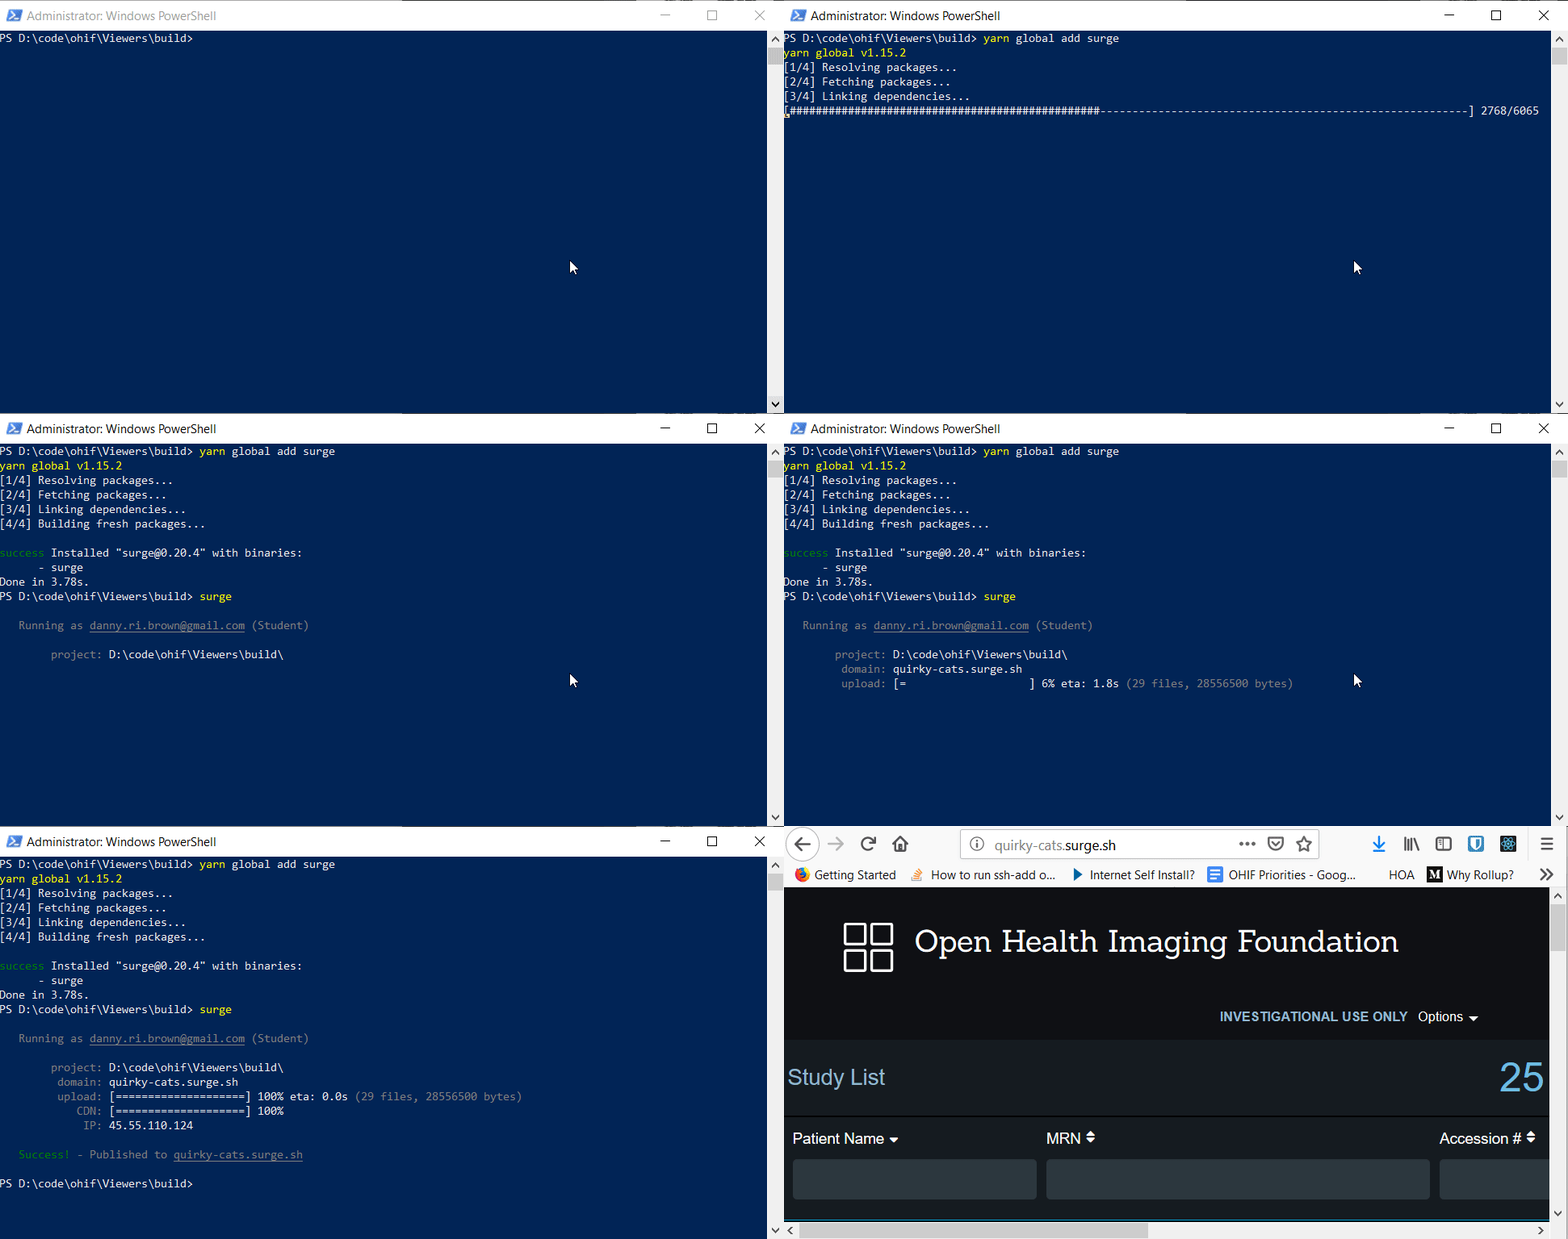
Surge.sh
Static web publishing for Front-End Developers. Simple, single-command web publishing. Publish HTML, CSS, and JS for free, without leaving the command line.

GIF demonstrating deployment with surge
# Add surge command
yarn global add surge

# In the build directory
surge
Features:
- Free custom domain support
- Free SSL for surge.sh subdomains
- pushState support for single page apps
- Custom 404.html pages
- Barrier-free deployment through the CLI
- Easy integration into your Grunt toolchain
- Cross-origin resource support
- And more…
Learn more about surge.sh on their website
GitHub Pages
WARNING! While great for project sites and light use, it is not advised to use GitHub Pages for production workloads. Please consider using a different service for mission critical applications.
Websites for you and your projects. Hosted directly from your GitHub repository. Just edit, push, and your changes are live.
This deployment strategy makes more sense if you intend to maintain your project in
a GitHub repository. It allows you to specify a branch or folder as the
target for a GitHub Page's website. As you push code changes, the hosted content
updates to reflect those changes.
- Head over to GitHub.com and create a new repository, or go to an existing one. Click on the Settings tab.
- Scroll down to the GitHub Pages section. Choose the
branchorfolderyou would like as the "root" of your website. - Fire up a browser and go to
http://username.github.io/repository
Configuring Your Site:
Learn more about GitHub Pages on its website
Advanced
All of these options, while using providers with more service offerings, demonstrate how to host the viewer with their respective file storage and CDN offerings. While you can serve your static assets this way, if you're going through the trouble of using AWS/GCP/Azure, it's more likely you're doing so to avoid using a proxy or to simplify authentication.
If that is the case, check out some of our more advanced docker deployments
that target these providers from the left-hand sidepanel.
These guides can be a bit longer and an update more frequently. To provide accurate documentation, we will link to each provider's own recommended steps:
AWS S3 + Cloudfront
GCP + Cloudflare
Azure
Deploying viewer to Azure blob storage as a static website: Refer to Host a static website High level steps :
1. Go to Azure portal and create a storage account.
2. Under Overview->Capabilities, select Static website.
3. Enable Static website. Set the index document as ‘index.html’.
4. Copy the primary endpoint. This will serve as the root URL for the viewer.
5. Save. A new container named ‘$web’ will be created.
6. Copy OHIF viewer’s build output from ‘platform\app\dist’ folder to the ‘$web’ container.
7. Open browser and navigate to the viewer root URL copied in the step above. It should display OHIF viewer with data from default data source.
Special consideration while accessing DicomJson data source : • Due to the way routing is handled in react, it may error out in production when trying to display data through dicomJson data source. E.g. https://[Static Website endpoint]/viewer/dicomjson?url= https://ohif-dicom-json-example.s3.amazonaws.com/LIDC-IDRI-0001.json • Resolution to this is to set error page to ‘index.html’ at the website level. This will ensure that all errors are redirected to root and requests are further served from root path.